Showing posts with label recipe. Show all posts

December 27, 2014

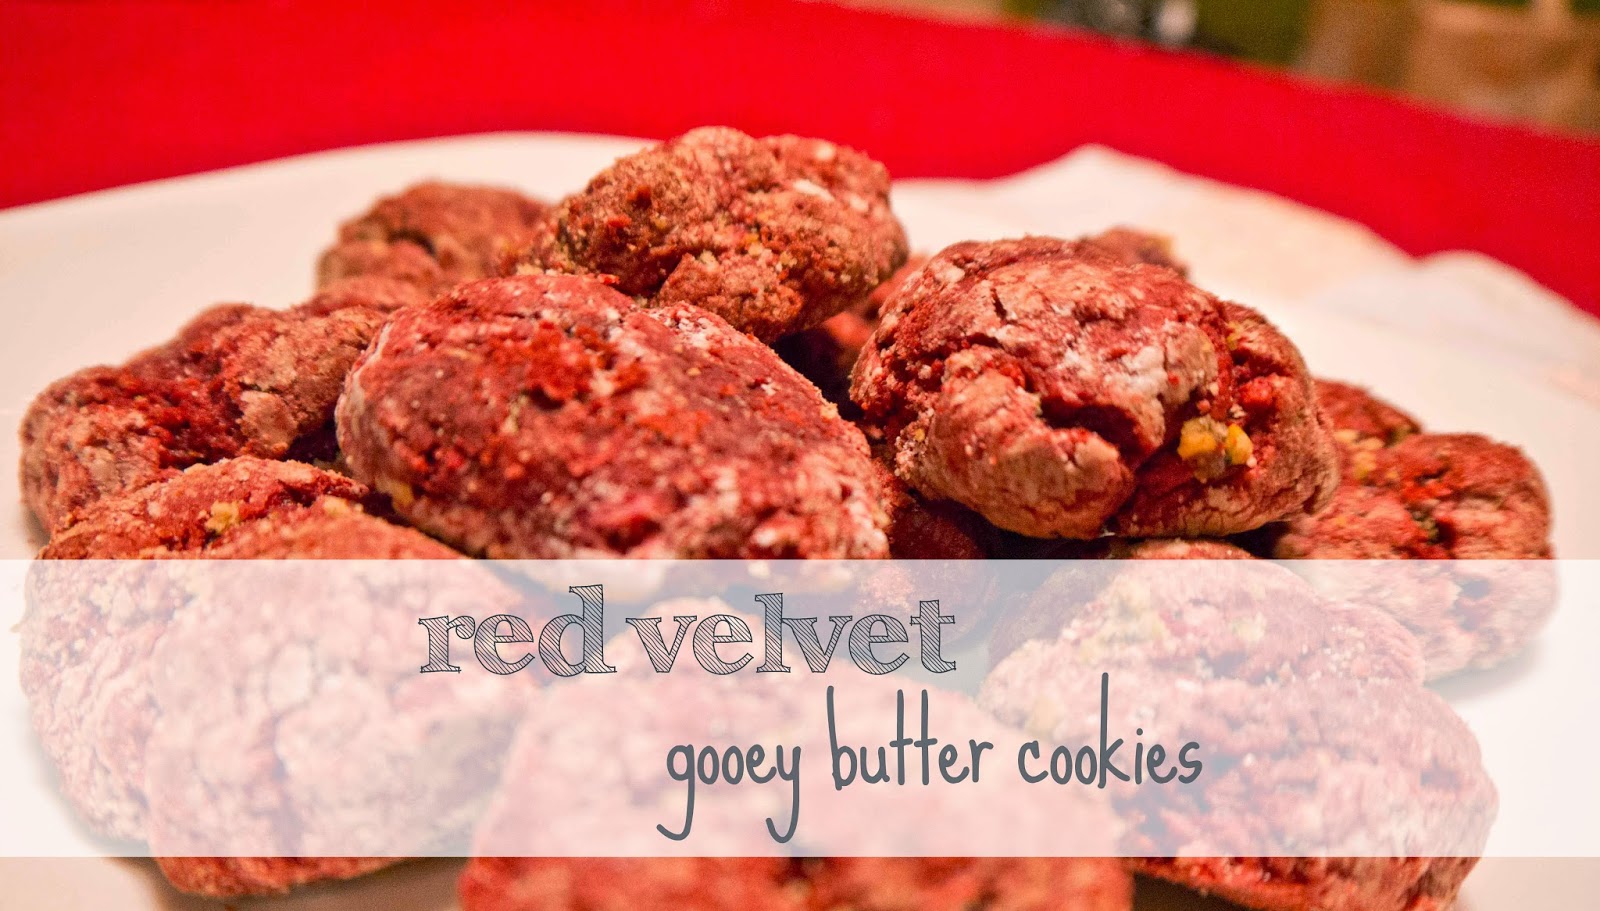
red velvet gooey butter cookies

 
I'm not much of a baker... I really enjoy stirring.  You know when you are reading the instructions for baking and they always warn you not to "overstir"?  I'm fairly certain that is aimed directly at me.  Also - baking is slooooowwwwwww and I just don't have time to wait!  I get really impatient and/or bored.  Five trays of cookies?  No thanks.  After the first one is out of the oven I'm pretty much over it.

Anyway - I baked with some friends for 7 hours.  I've never done that before - an all-day baking extravaganza.  It was intense.  While I had a lot of fun (and learned a lot) I was pretty much exhausted by the end of it, and was able to further confirm my theory that I'm not meant to bake things.

The recipe I wanted to make was red velvet gooey butter cookies.  For those of you who don't know, gooey butter cake is a St. Louis thing.  It is this amazingly delicious sugary cake that we love.  We love it so much, we turned it into cookies.  And from there, red velvet gooey butter cookies evolved.  Since we've already established that I am not a baker, chances are I will never bake a gooey butter cake.  The cookie version is the closest I will ever get.

If you have never had gooey butter cake/cookies, I encourage you to try some!  If you have had them before, try this recipe to shake things up a bit.


Red Velvet Gooey Butter Cookies

Ingredients:
  • 1 pkg red velvet cakemix
  • 1 pkg (8 oz) cream cheese, softened
  • 1/2 cup butter, softened
  • 1/4 tsp vanilla extract
  • 1 egg
  • 1/4 cup powdered sugar 

Directions:
  1. Preheat oven to 350 degrees.  Combine all ingredients, except powdered suagr, and chill in refrigerator for at least 2 hours
  2. Roll into 1" balls, then roll in powdered sugar.  Place on ungreased cookie sheet and bake for 10 to 12 minutes.
  3. Optional: roll in powdered sugar again once cooled.


*Disclaimer:  we did not roll our cookies in the powdered sugar after they cooled.  Also, these were mixed in a bag with a lot of other cookies which is why you might notice a few crumbs on them :)

Enjoy!

November 4, 2014

halloween party 2014

If you haven't already caught on, my husband and I love Halloween.

Not kidding, the last two years we took off the day after Halloween (also known as November 1st) so we could go Halloween-clearance-shopping.

Before we even bought our house, we had already decided that we would throw an annual Halloween party.  This is our third year, and it keeps getting better and better!

After throwing parties, you start to figure some things out.  These are a few of the lessons we have learned:
  • Most people will show up 30-60 minutes after the party "officially" starts
  • There will be at least one person who shows up on time, or *gasp* early.  Be (mostly) prepared for guests to be at your house when the party "officially" starts (read: don't be in your bathrobe)
  • When it comes to alcohol, most people will bring their own.  At first, we would buy tons of beer and such for the party (trying to be good hosts), and end up with more beer leftover than what we started with
  • People will leave their leftover alcohol behind.  Be prepared to give it away to friends and neighbors if you won't consume it
  • Guests like to have snacks, but unless they are there at meal-time, they will not want heavy food.  We usually stick with finger-foods and snack items that can stay out for a while and not have to be kept hot/cold

Check out some of the additional decorating we do and the snacks we put out!


Each year I try to do a little bit of a different spread.  Some things are repeats because they are requested by others.  New this year: chocolate covered pretzels that look like bones and a cheese ball that looks like a pumpkin!


Find a similar recipe here for this pumpkin cheese ball


I like this post here for a quick recipe to make these pretty convincing "bones" ;)


The first year we had the party I ventured out and made pudding shots, which I had only heard about on Pinterest but never made before.  They were phenomenal.  Everyone really enjoyed them.  So I make them every year now.  They are like little tiny ice cream cups of magical goodness.  There are plenty of recipe combinations online.  Here are a few of my favorites:
  • orange creamsicle - vanilla pudding + orange vodka  (or orange pudding + vanilla vodka)
  • thin mint - chocolate pudding + mint liqueur 
  • root beer float - vanilla pudding + root beer vodka
  • pumpkin pie - pumpkin pudding (if you can find it!) + whipped cream vodka

Hope you all had an awesome Halloween!!  What were your favorite decorations or snacks at the parties you attended?

October 21, 2014

homemade applesauce


I've never been much of a cook.  It's not that I don't like to cook.  I am just not very adventurous when it comes to food, and I'm picky.  So, when my husband and I moved in together, he took over about 80% of the cooking.  He is always encouraging me to make things from scratch.  I am usually pretty reluctant because the recipe seems 'hard" or "a lot of work".  So last year after we went apple picking he suggested I make homemade applesauce.  I figured, well, I might as well try to since we have bags of apples to use up.  Let me tell you, it is so easy.  I am super glad he encouraged me to make it!  I look forward to apple picking and making applesauce each Fall now :)

There are tons of recipes for applesauce, but they are all pretty much the same.  This will be more of a step-by-step tutorial, and you can use whatever ingredients you like.

Before we get going, I have to admit that modern technology helps me greatly during my applesauce-making.  We received a Pampered Chef apple peeler/corer/slicer as a wedding gift.  If it wasn't for that thing, I am almost certain I would not be making applesauce.  It does all of the work for you, and quickly too!

Ok, so take your family or friends or significant other or dog (or anyone else that might be fun) and go the apple orchard.  Pick some beautiful apples, go on a hayride and blow up your friends' Instagram feed.  When you get home, make sure to wash all of the apples, as sometimes there is *eh-hmm* droppings and such on them.


Once you have all of the fruit washed, you can begin peeling, coring and slicing.  If you don't have a fancy doo-hickey that does the work for you, I am certain there are youtube videos covering various methods for hand-peeling.


I recommend putting a cutting board underneath your workspace, the apples tend to be messy.  About 7 apples in, I pulled back the tablecloth and actually put a kitchen towel underneath the cutting board - the apple juice was getting everywhere!

Once you are finished peeling all of the apples, you will get a big bowl of apples ready-to-cook and a big bowl of scraps.  While I was peeling the apples, my husband was reading all of these recipes for things you can do with apple peels (make tea, potpourri, etc.).  I decided to compost them (the other recipes sounded hard....)


Depending on how many apples you have, you may need a very large stockpot.  I should have used a larger one, but we didn't have one, so I just had overflowing apples!

From there, you add some water and whatever sugar and spices you want to use.  I recommend brown sugar over white.  I used a lot of cinnamon and a little bit of pumpkin pie spice - it adds a little spice and zing that you don't get from the cinnamon.


I should have mentioned before, but applesauce takes several hours to cook.  The more apples you have, the longer it takes.  I think this batch took 5 or 6 hours.  You don't need to be standing in front of the stove the entire time, but you should definitely be at home and keeping an eye on it.  Making applesauce is a great activity to pair with watching your plants grow, finding your lost socks, or a Netflix marathon.

Basically, you keep the applesauce at a simmer.  Occasionally give it a stir and taste test, add sugar and spices as you feel necessary.  The more you stir your applesauce, the smoother it will get.  Some people mash theirs with a masher, but this seems unnecessary to me as the applesauce has a nice consistency and texture by the time all of the water and juice is cooked out.


And that is what it looks like when it is done (and you have canned six jars of it and forgot to take a picture before you started canning...).  We ended up with 9 jars of applesauce.  You don't have to put it in jars; we like to because pretty much I am the only one who eats it and I don't want it to go bad.

So that's it, really.  Pretty simple stuff.  And it makes a great side dish for Thanksgiving, plus then you don't have to worry about getting to the store when all the crazies are there!

What is your favorite thing to make from scratch?  Let me know in the comments below!